
Alpha-Pujo is the third robot I've built. I originally planned on building my competition bot, Empujo, directly after Mark II. However, Mark II uncovered so many issues, I wanted to make sure I could resolve them all. I figured one more iteration would help me address these issues, and hopefully not uncover too many more.
Goals
I wanted to accomplish the following goals when building Alpha-Pujo:
- Four wheel drive. Having a 3 wheel system in Mark II caused problems, especially the caster wheel.
- No overhaning axles. While not causing problems w/ Mark II, I knew that overhung axles were not acceptable for a BattleBot.
- Ballbearing supported axles.
- Decent distribution of weight. Mark II had an uneven distribution.
- Ease of Maintenance. Mark II had a horrible case, and too many interconnected parts.
Design
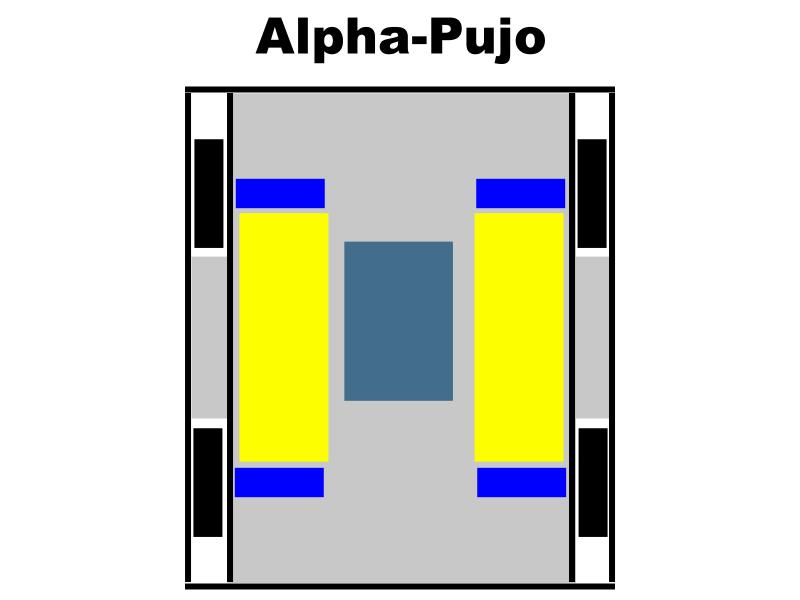
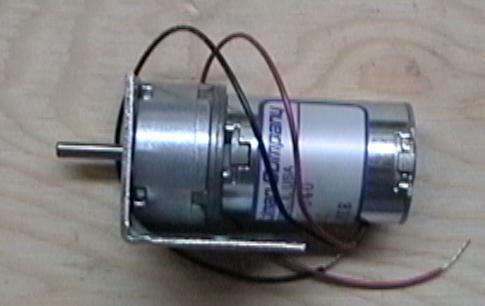
I drew out a simple schematic of Alpha-Pujo using a paint program (see above). This helped me calculate the needed width and length of the frame. I had a bunch of roller-blade ball bearings laying around. They're approximately 1/4 " thick. These were originally planned for use in Empujo, so I thought I'd give them a try here as well.
I decided to make the main frame out of 1/4" aluminum. This would allow me to easily mount the bearings within the frame. I knew from building Mark II that 1.75" was enough height for my components. I decided to make Alpha-Poju's frame 2" tall.
After sketching things out, it looked like 13" long by 11" wide would be ample size. I ordered the extra motors and batteries, and started at it.
Building
2/17/2001
I cut out a 11" X 13" inch piece
of plexi-glass. I'm sure plexi-glass is too
weak for real bot's but I'm sure it will
work fine for my purposes.
I also cut the first side beam from the 1/4" X 2" bar. Cutting this with a hack saw is no fun! I tried to grind a nice square end onto it. We'll see how this works out in the long run.
2/19
I started on the frame today. I cut the two
11" end pieces. I then realized the
13" piece I cut a few days ago was .5"
too long. Doh!
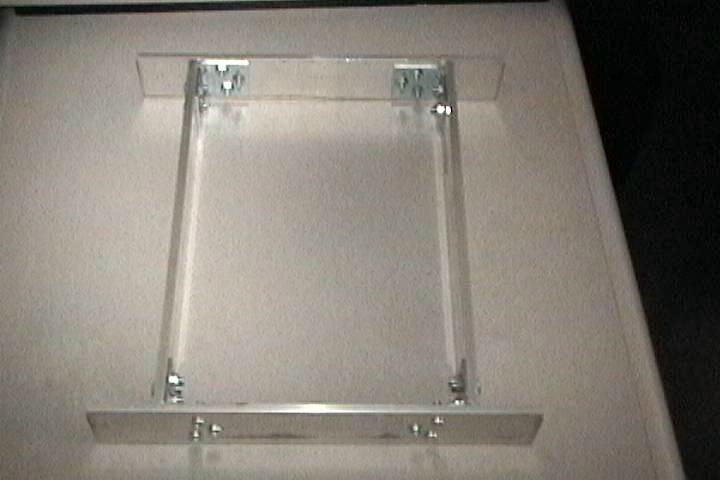
I got thru 4 of the six pieces, and decided to bolt them together. Here are a few pictures.

03/08/2001
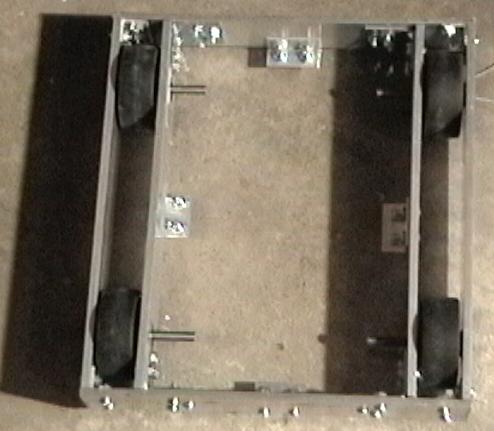
I've put a bit more work into Alpha-Pujo. First, I added a plexiglass bottom to the frame. I attached these with a few small L-brackets to the existing frame members. I would have liked to use aluminum, but the local hardware store didn't have any appropriate stock.
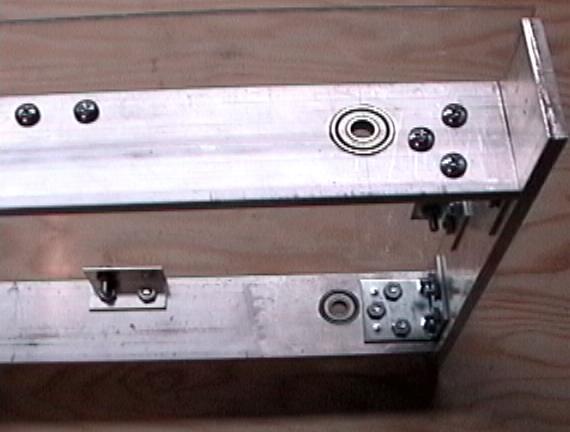
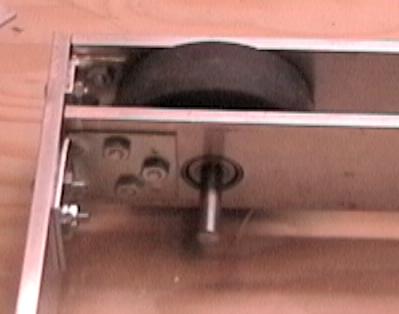
I next started working on the bearings. I had decided to place the bearings directly inside the frame. I did this by drilling 27/32" holes into the frame at the appropriate places. I then used my vise to force the bearings into the holes. I had planned on placing a retaining panel over them, but it was such a tight fit, I doubt I'll have to do anything else to secure them.
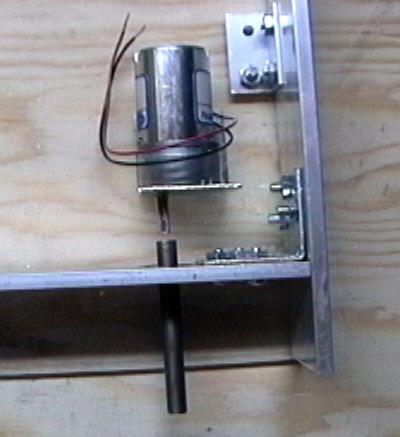
I also created some simple motor mounts by using some leftover L brackets I had bought for the frame.
The plan is to add another rail to the frame and place another set of bearing there, so that the wheels are completely supported by bearings in the frame.
I'm becoming a bit concerned about the weight of the bot. It's amazing how much heavier then wood aluminum is. Those tiny Barber-Colman motors might not be able to move Alpha-Pujo. I may drill out portions of the frame to lighten things up a bit.
03/11/2001
Damn! What a lot of work these bots are! I really thought I'd have a drivable version after a bit more work. I really underestimated the time required to tie up the rest of the loose ends.
I cut the two remaining beams, drilled out the bearing holes, and mounted the bearings. Afterwards everything fit fairly well. I also drilled out the holes required to bolt the outer beams to the front and back. Here are a few pics with the wheels sitting in the frame.
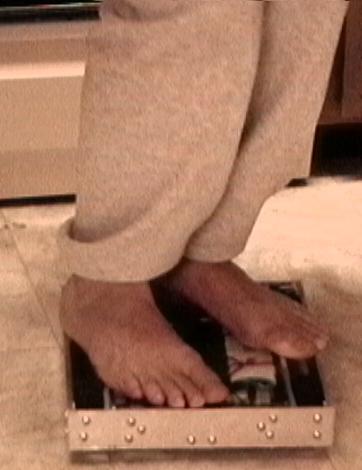
With the wheels mounted on the axles, I'm able to stand on the frame (~190 lbs) without doing any damage. Pretty cool stuff.
I've decided I really need to eventually replace the base panel of plexiglass with something more solid. I cracked the panel several times trying to trim it down to size. Plus, the stuff stinks like hell when you cut it!
I probably would have some driving pics, but I've discovered that drilling a center hole in the ends of the axles for the motor shaft is much more difficult then I imagined. I gave it about 5 shots before giving up. I then posted to the BattleBots Forum outlining my problem, and have some new ideas on how to proceed.
3/20/2001
AlphaPujo is done!
I spent a few days working on mounting the motors to the axles. This did prove to be difficult. After reading all the posts to the forum, I decided to try to use the "Magic Marker" method of drilling holes. Basically, I placed the axles in the bearing so they would rotate freely. I then used a magic marker to start drawing on the end of the axle. As I spun the axle, I slowly moved the marker closer to the center. Eventually, there was a very small dot in the exact center of the axle. I then used a center punch on the dot, giving me a nice centered spot to start drilling.
Unfortunately, once I drilled the hole, it always was off center a bit. I eventually gave up trying to get any closer, and just decided to run with what I had. I placed pins in the wheels, and also used pins to connect the motors to the axles. I then bolted the motor mounts to the base plate.
In my excitement to do the first test drive, I closed the locked garage door behind me, with my keys still in the garage. I was also locked out of my house, so I spent a few moments walking around my condo, robot in hand, trying to determine what to do. Luckily I had left a window unlocked, and was able to crawl thru it without freaking out my neighbors.
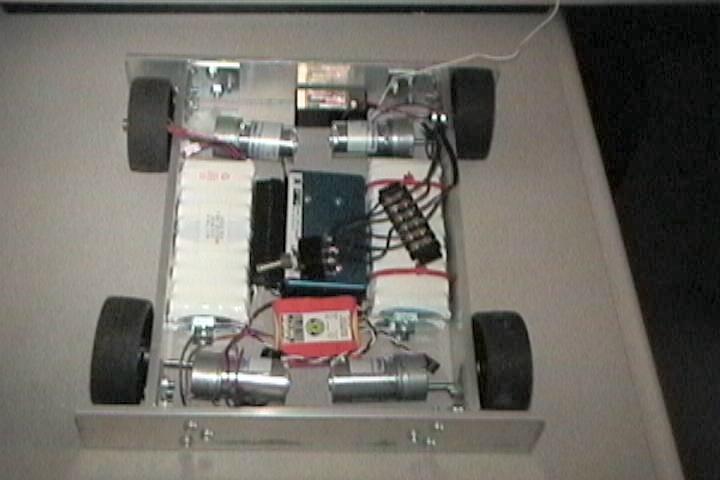
Here's a pic of AlphaPujo with all his components installed:
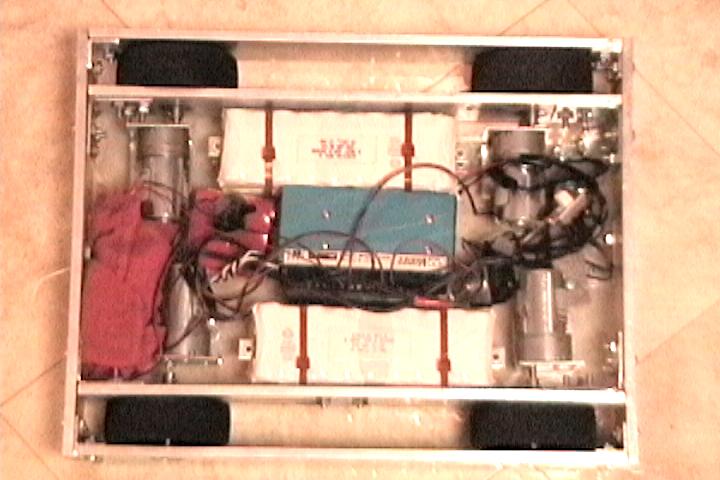
AlphaPujo drives well. In 24 volt mode, he zips around nicely. Having my front and rear wheels so far apart makes him struggle a bit to turn. He definitely is easier to drive in a straight line then Mark II.
The cats hate him:

It turned out to be a fortunate thing that I had a plexiglass base plate. Due to my motor shafts not being centered in the axle, under driving power, the base plate flexes slightly as the motors turn.
To my surprise, I can stand on AlphaPujo and drive in forward and reverse. I would have never imagined such small motors would be able to move me.
I plan on making a few mods here and there to AlphaPujo, but for now I'm focusing on the next big thing... Dark Matter!
Conclusions
What Went Right
- Four wheels is great for driving straight.
- Ball bearing support for axle is a great thing. You gain a much greater carrying capacity.
- Planning things in advance is a great help.
- Metal frames are strong!
What Went Wrong
- Plexiglass sucks to work with.
- It's difficult, if not impossible to center holes in axles without a lathe.
- I ran out of space, even after drawing a schematic to scale. I failed to take into account how much "slop" space would be consumed. Either that, or I mis-measured a few components.
- My wheel layout was great in some respects, but made turning difficult. I should have place the front and rear wheels a bit closer together.
- Although the frame is strong, bolting it together was a lot of work. Welding has got to be the answer!