Pete Covert
Design & Part Selection The idea for Solaris originally grew out of the desire to build a bot with an active weapon. I started thinking about a 12 pound drummer in January of 2002. At that time, I wasn't aware of any other 12 pound drummers. We had been pitted relatively close to the Little Drummer Boys at TI 1, and had really been impressed with their bot's performance. My previous bot, AlphaPujo, had been a fairly conservative wedge bot. I wanted to try to push the envelope a bit with Solaris. I wanted to try a few new design ideas that neither Ted and I had tried before, along with a few new materials and components. |
|
 |
I knew that I wouldn't be able to design and build an entirely new 12 pounder before HSRC '02, which was the next big event Ted and I were planning on going to. Instead, we opted to build a 30 pound drummer together. This 30 pound bot became Helios, our most successful bot. |
 |
The success of Helios made me want to make a 12 pound drummer even more. I borrowed several ideas from Helios, eventually arriving at a design that was basically a miniaturized version of Helios. |
 |
We'd been having such great luck with the HandiWorks drills, I decided to try to use only two of them to power the drivetrain. Instead of using chain to gang the rear wheels to the front, I thought I'd give a belt drive a try. I ordered my pulleys and belts from Stock Drive Products, who also has a very handy center distance calculator which helps determine what size belts and pulleys to use. |
 |
For the speed controllers, I decided to try the Traxxas XL-1s, available at Tower Hobbies. These cost about $40, have no reverse delay, and can handle up to 8.4 volts. The only downside to them is their size. They are fairly large for a car/truck ESC. I tested these ESCs at 9.6V, having heard rumors that they could handle that voltage. However, after noticing a faint whisp of smoke, I decided to run them at a saner 7.2 volts. |

|
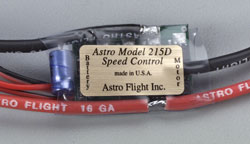
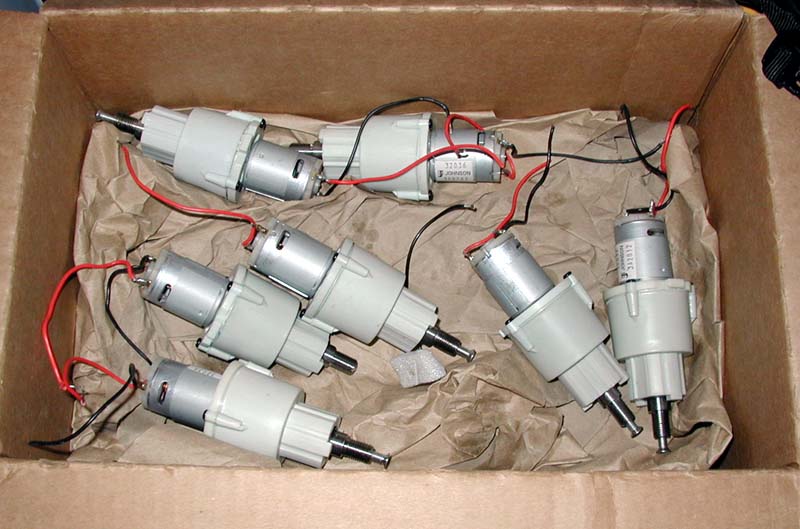
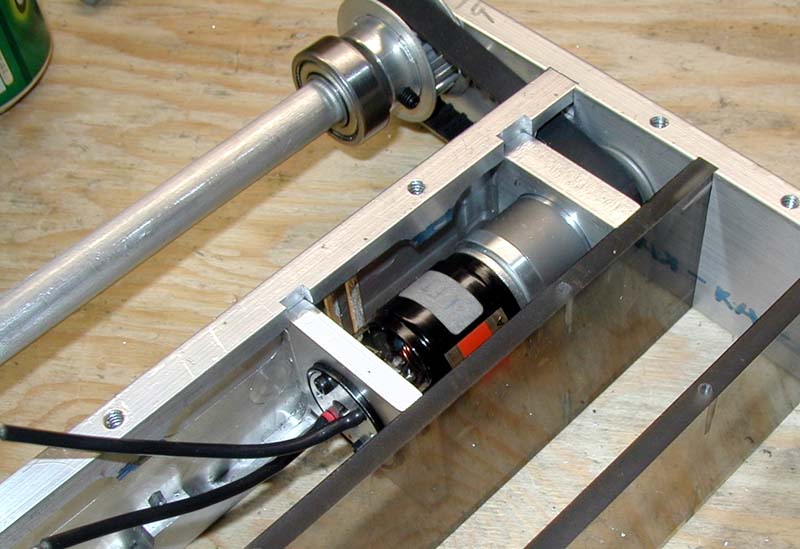
To spin the drum, I chose a ProMaxx 400 motor and gear box. I found them at Northeast Sailplane for $130. To control the motor, I chose an Astroflight 215D speed controller, bought from Tower Hobbies. It is rated for 10 cells, and can handle 40 amp surges.
We typically shy away from exotic motors. They always seem so touchy, and the failure point for many bots. However, due to the 12 pound limit, I was willing to go with something exotic, just for the weight savings. |
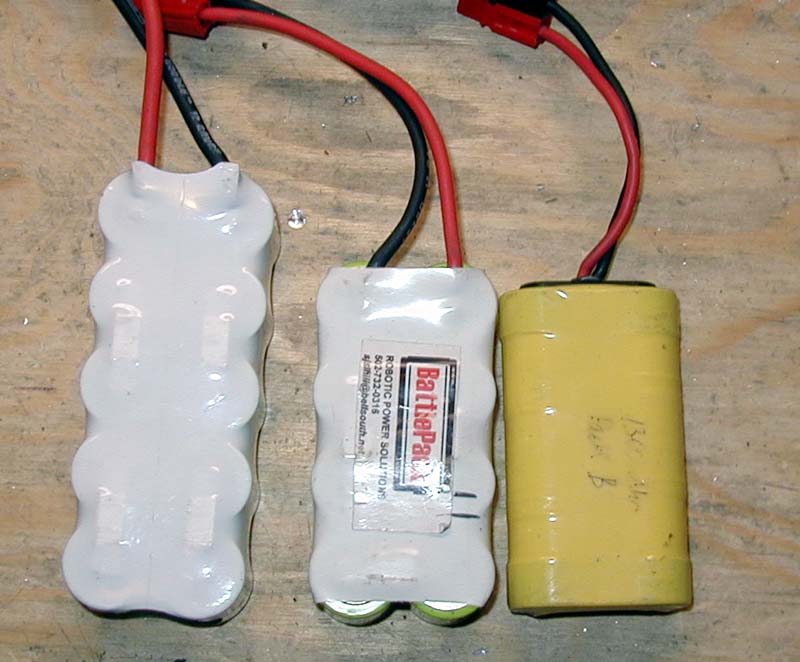 |
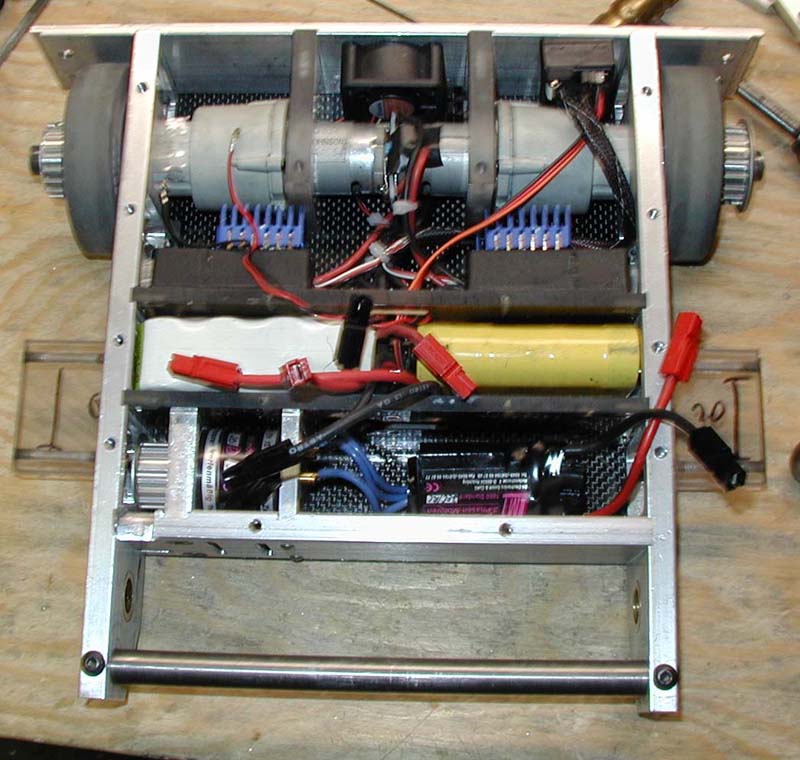
To power everything, I went with a couple of custom made packs from BattlePacks. I used CP 1300 cells. These cells can deliver 30 amps for 3 minutes straight. I've had great luck using them in AlphaPujo. I used a 7.2 volt pack for the drive, and a 12 volt pack for the weapon. |

|
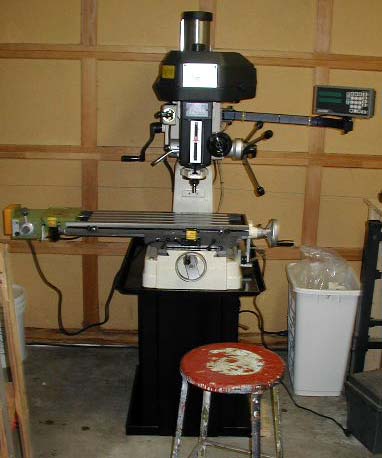
Around the time I started accumulating parts, I used my tax refund to help purchase a Mill/Drill from Enco. I had been squeezing in milling help from Ted at his college, but had always tried to minimize the required milling work required on my bots. Now that I had a small mill in my garage, I could go with much more elaborate designs. I knew I'd crossed some kind of hobby threshold when I ordered this thing. |
Building
| |
 |
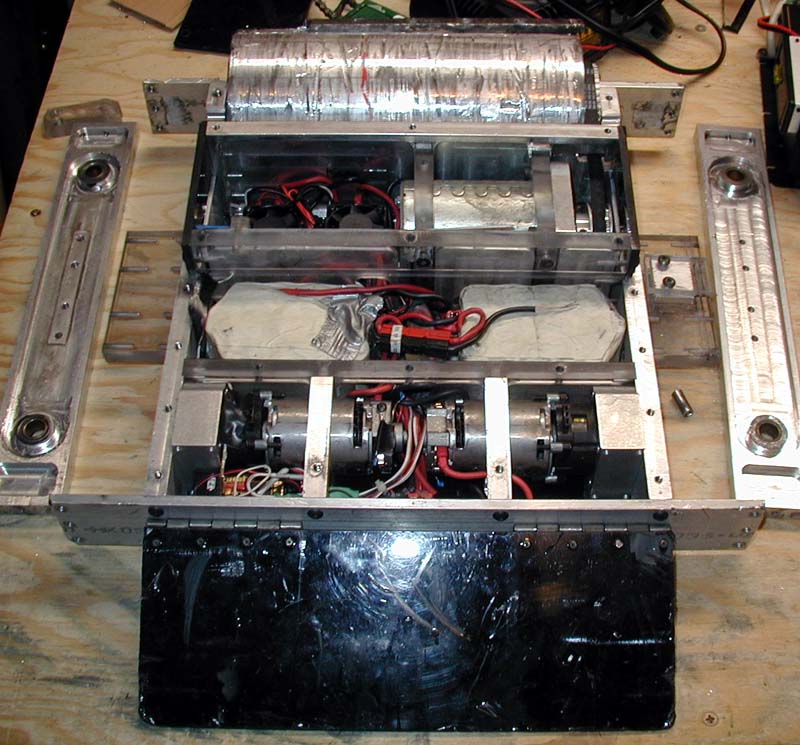
Having everything drawn out in a CAD program, the basic frame components came together quickly. I used 3/8" 6061 for the inner rails, and 3/16" 6061 everywhere else. There is a lot of polycarb in there too, 1/8" for the baseplate, and 1/4" for the various compartments. Polycarb tolerances run pretty loose, so it always is a good idea to measure the actual thickness of your material to ensure everything fits together well. |
 |
One trick I borrowed from Helios was to inset as many frame members as I could. Note that the polycarb is inset 1/16" on each side. This helps avoid having a lot of bolts (4-40s in this case) in shear. It does require more precision though. |
 |
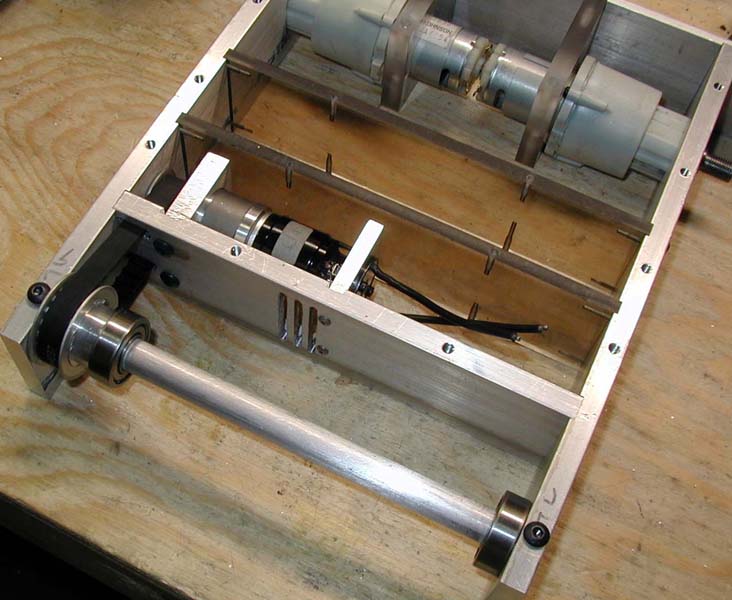
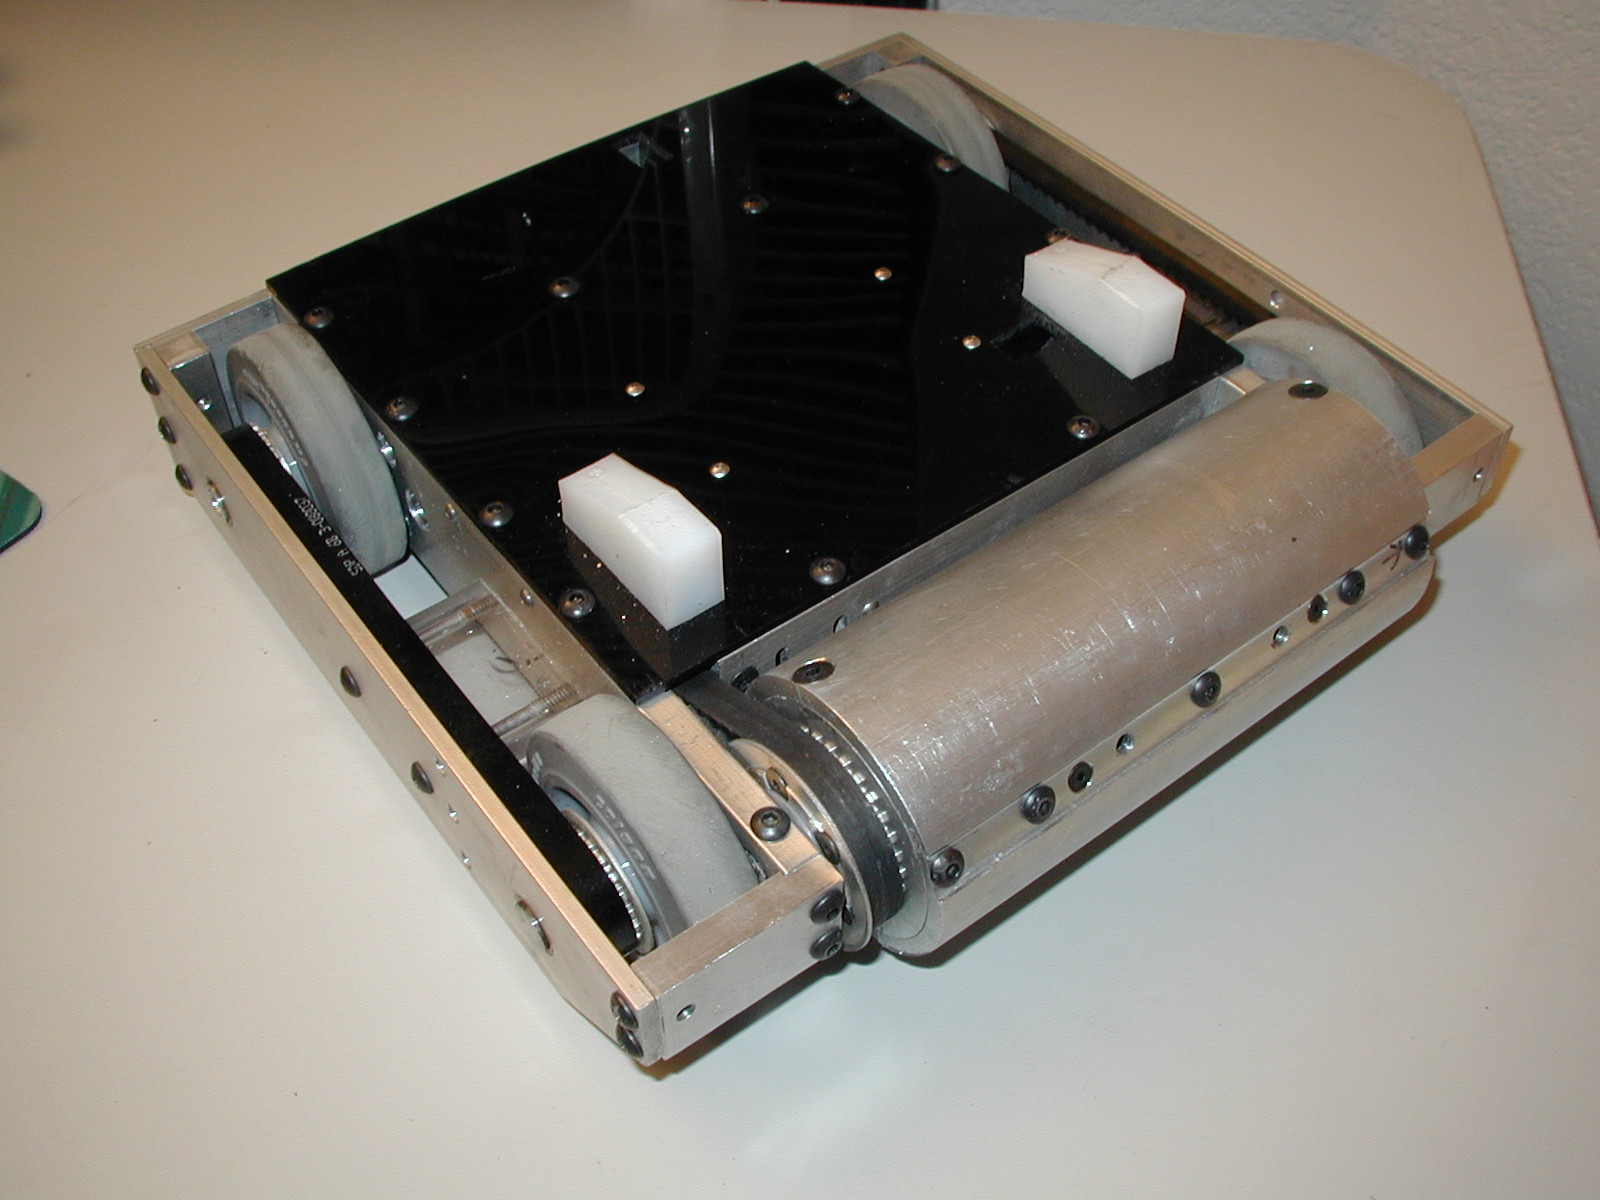
Here are most of the components laid out, to get a better feel of what Solaris would look like completed. |
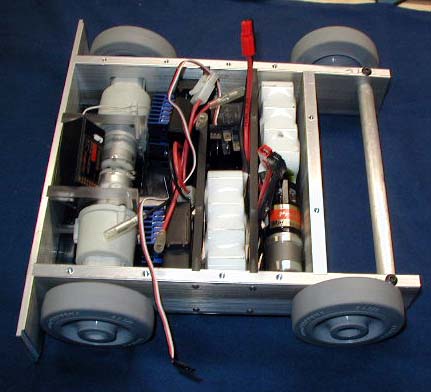 |
The drum axle is 1/2" 2011, from Online Metals. Will it be strong enough? Time will tell. The axle is installed, and a few more components are test fit. |
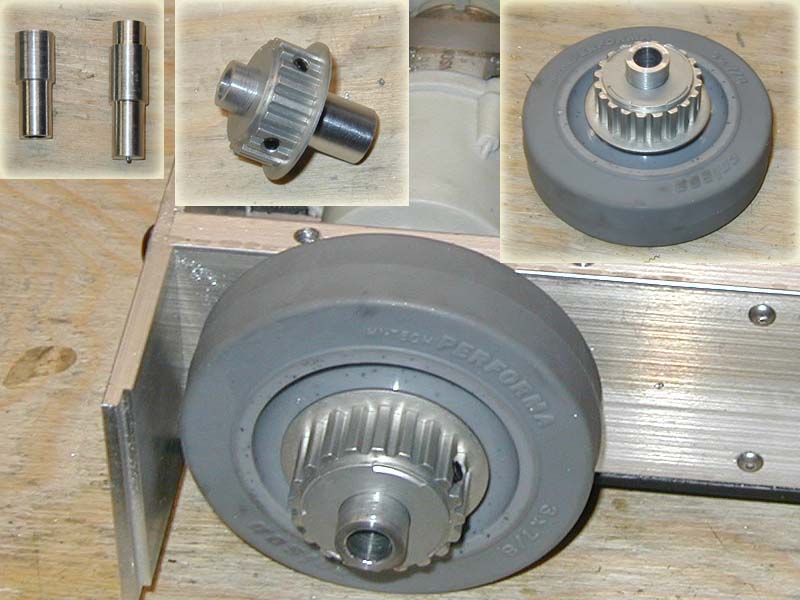 |
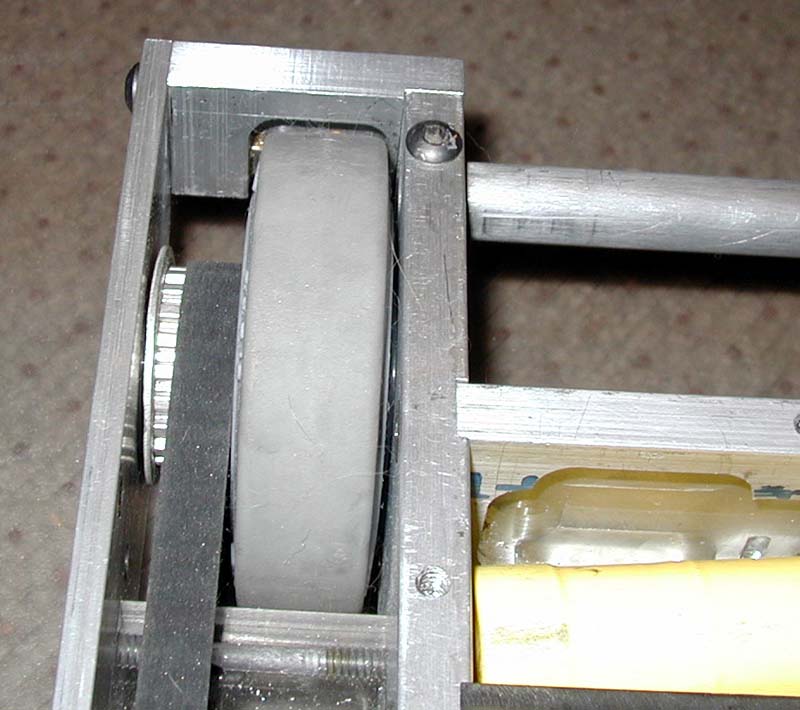
With a lot of Ted's help, I turned a few axles on his lathe. The rear axles had to be threaded so they screwed onto the output shaft of the Handiworks. They were hollow, so that I could insert the reverse threaded screw back through the axle, securing them to the drill. The front axle was simpler, being just a solid rod that had the proper diameter to snugly fit the colson, and a 1/2" diameter to fit into the frame and pulleys. I also drilled a hole into the colson, so that I could put a set screw through them to attach them to the axle (not pictured) |
|
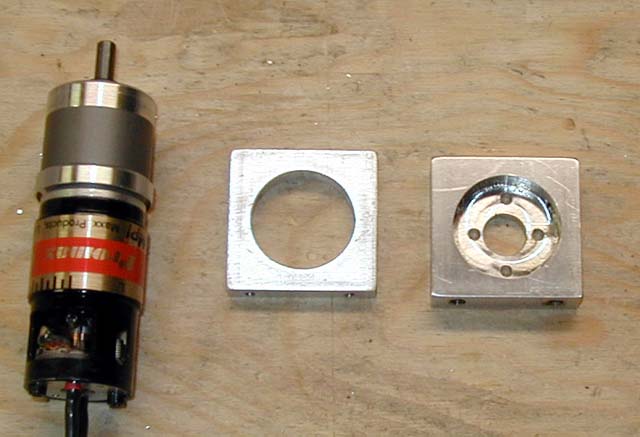
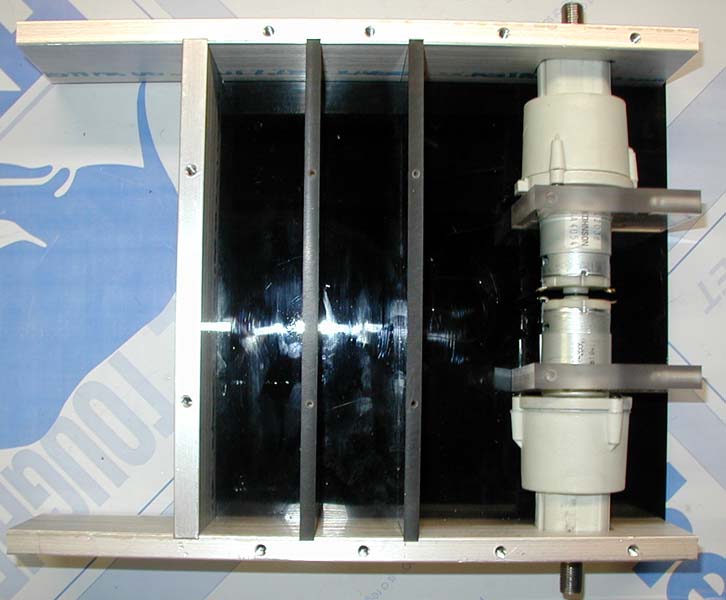
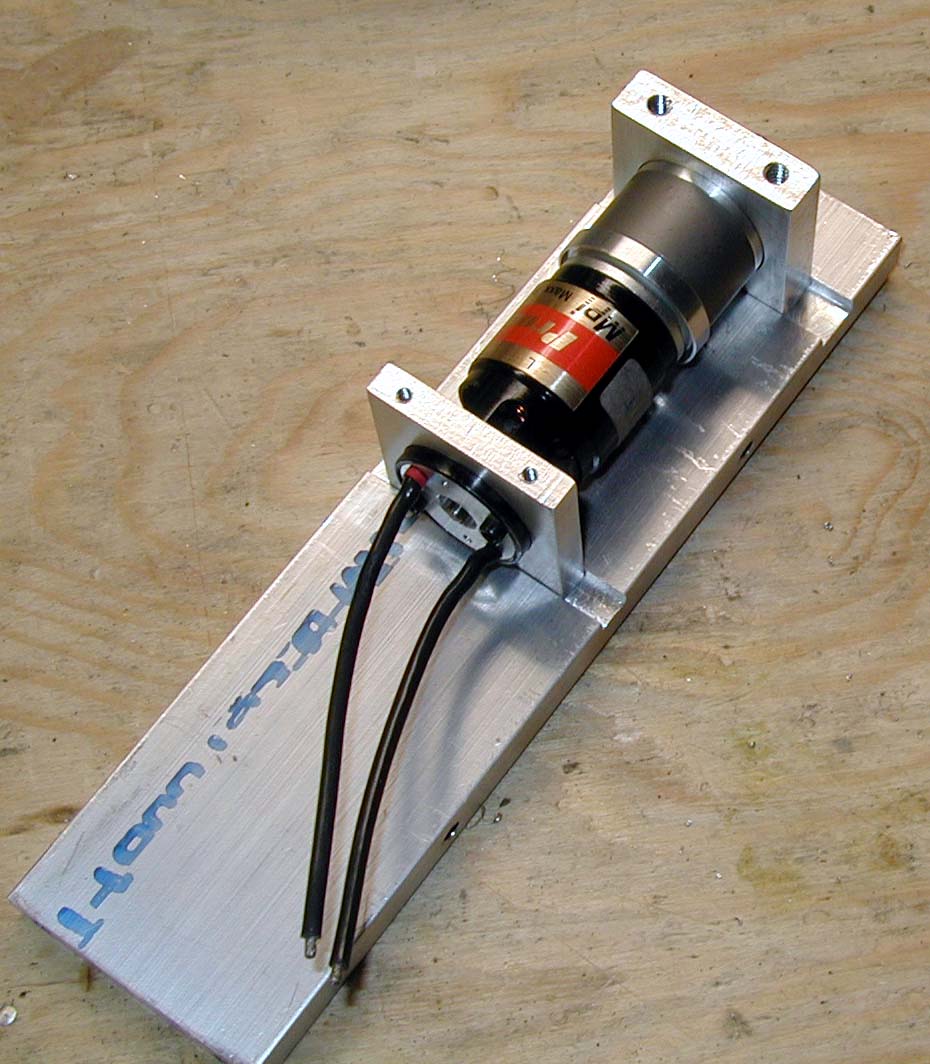
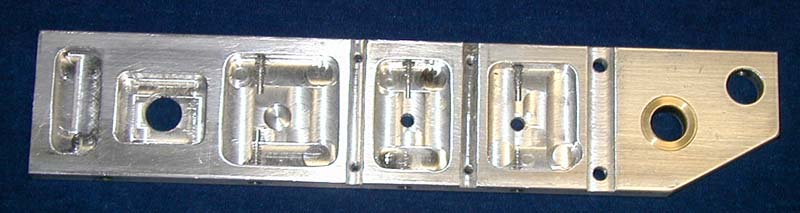
I next turned my attention to mounting the weapon motor. I CADed up a few mounts, and Derek Zahn was kind enough to CNC them for me. |
 |
I made a typical rookie mistake when I drilled the drum axle hole. I'd forgotten to offset .100" for the edge finder, thus I was off by .100" on the weapon mounts. I remedied this by slotting the front plate, rather then making new side rails. |
|
While I was at it, I decided to start lightening the front plate by doing some serious pocketing. I even cut a few cooling slits, since I suspected the ProMaxx would get hot. To help dissipate the heat from the ProMaxx, I used some thermal compound (available at most computer stores or Radio Shack) when placing the ProMaxx to it's mounts. In theory this would help transfer the heat to the aluminum mounts, and then to the front plate. It little tweaky stuff like this that makes building bots so much fun! |
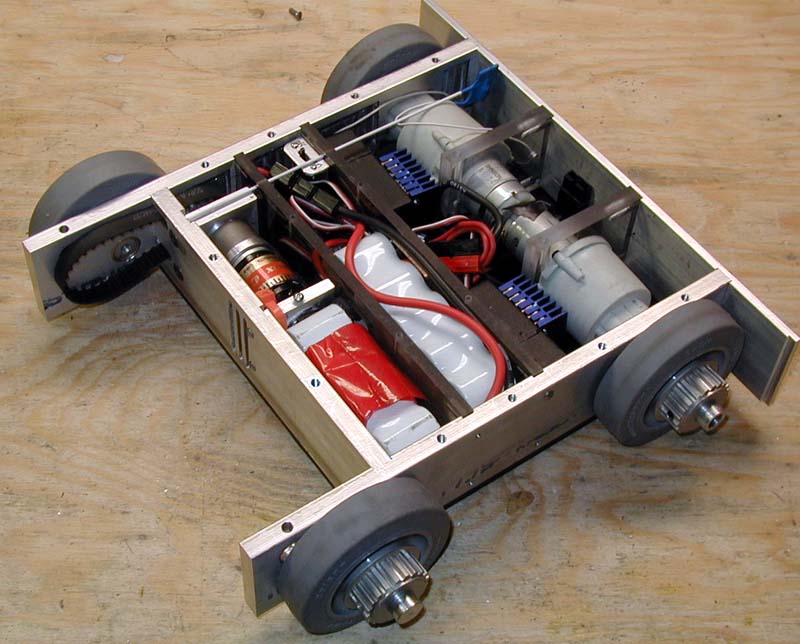 |
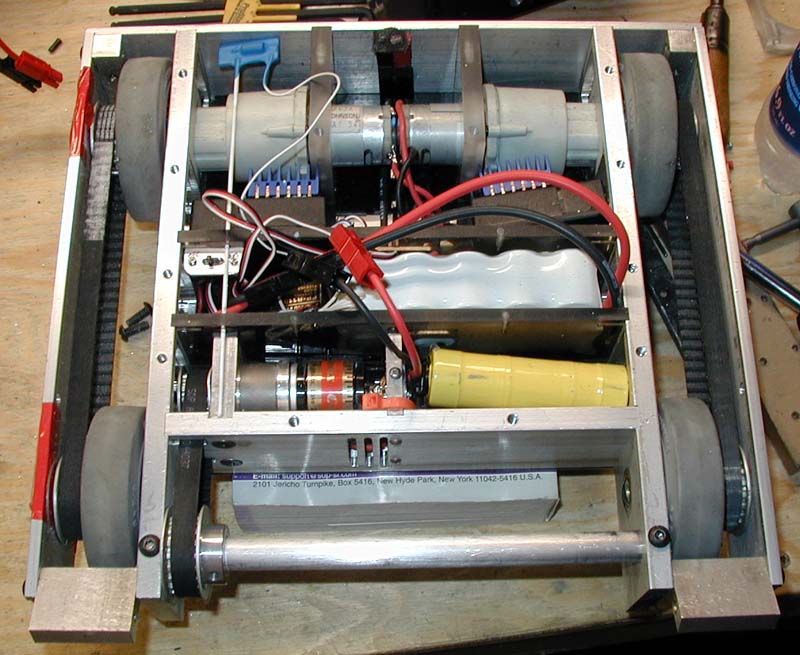
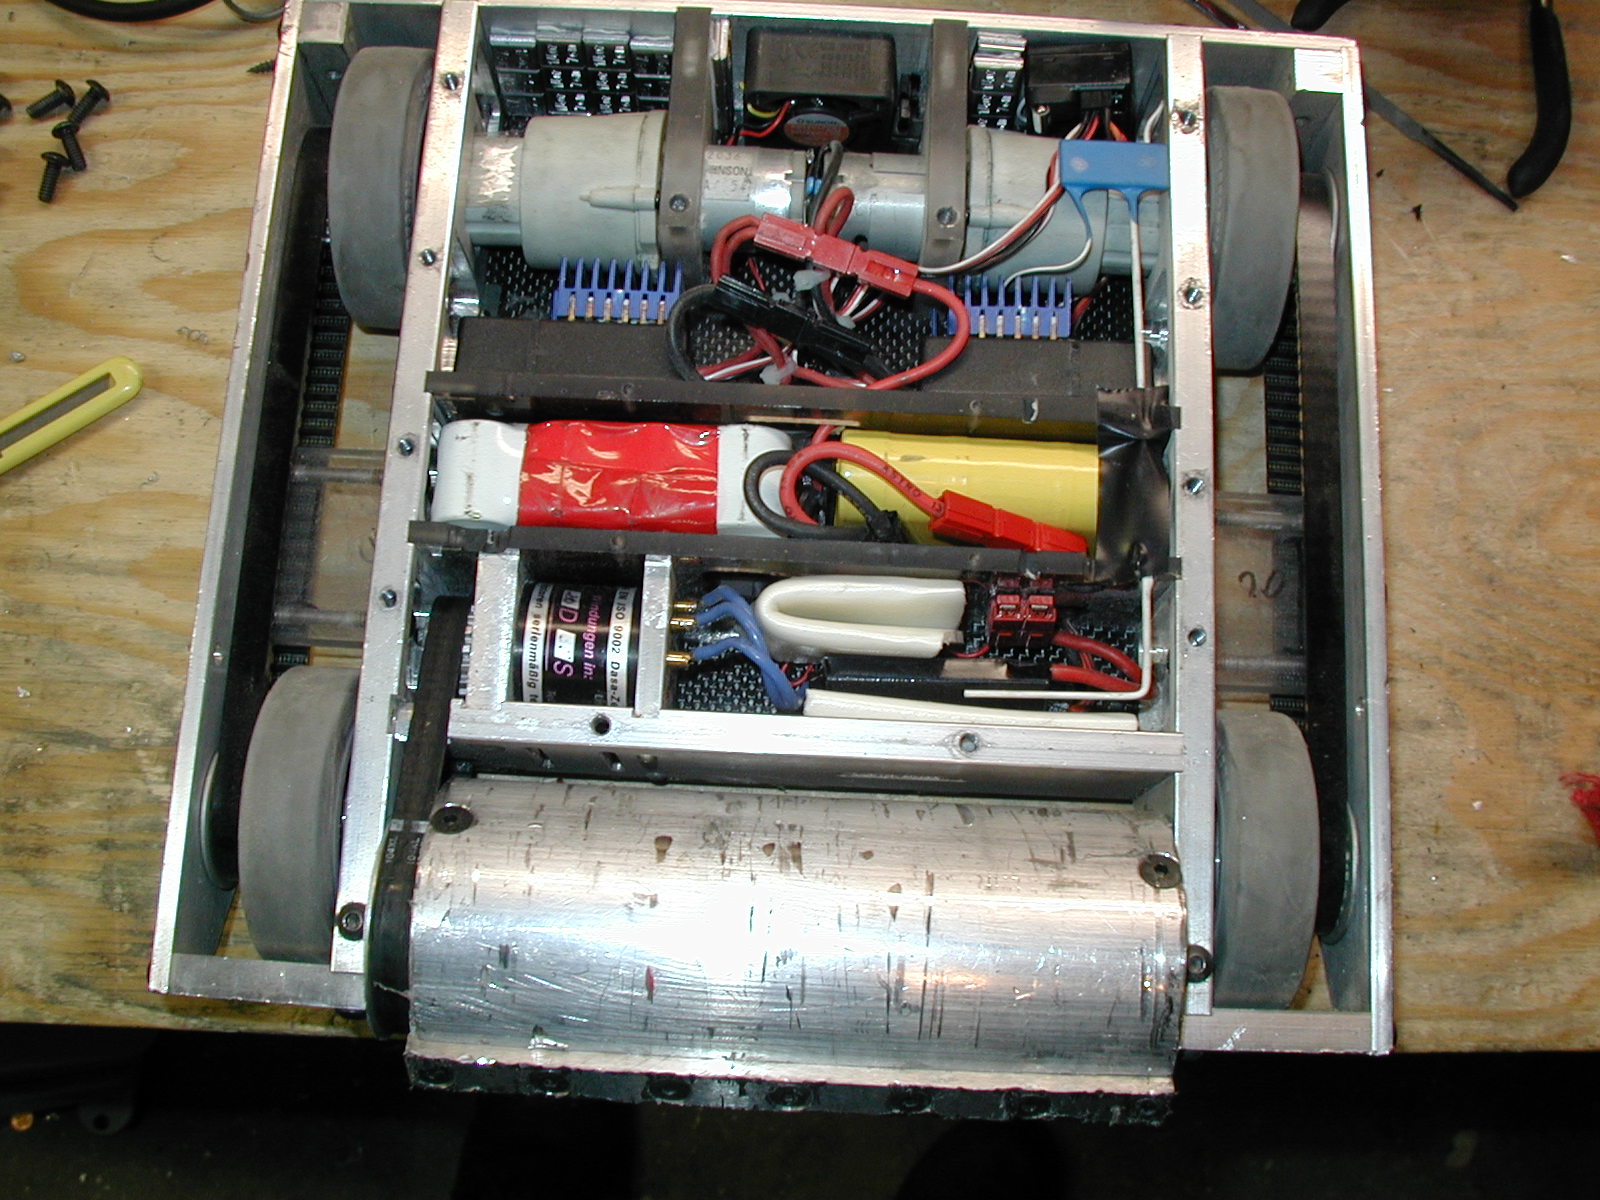
At this point, I wired everything up. I decided to go with an internal antenna, and a removable link near the rear. Things are a little tighter then I'd like, next time I need to allow more room for wiring in my CAD work! One problem I did run into with the ESCs was I originally wired things so that while driving forward, one ESC was showing a green light (signifying forward), and the other would show red (signifying reverse). This led to a bizarre pause when first launching, with resulted in a pull to the left. Refersing the leads on one motor and reprogramming my radio solved this problem, as both LEDs would light the same color when I went forward. |
| Putting the belts on the two pulleys made me realize I'd made another error in my milling. When drilling the front axle holes, I had measured from the opposite end of the piece, assuming I knew the proper length of the rail. I had forgotten I had added 1/16" in order to mate the side rails with the back plate. This made the belts too loose to use. Having no simple solution available, I had to take AlphaPujo to Steel Conflict instead of Solaris. That'll teach me to not update my drawings when I make changes on the fly! Also, if I would have made the entire piece in one sitting, instead of re-clamping it several times, it would never have happened. | |
 |
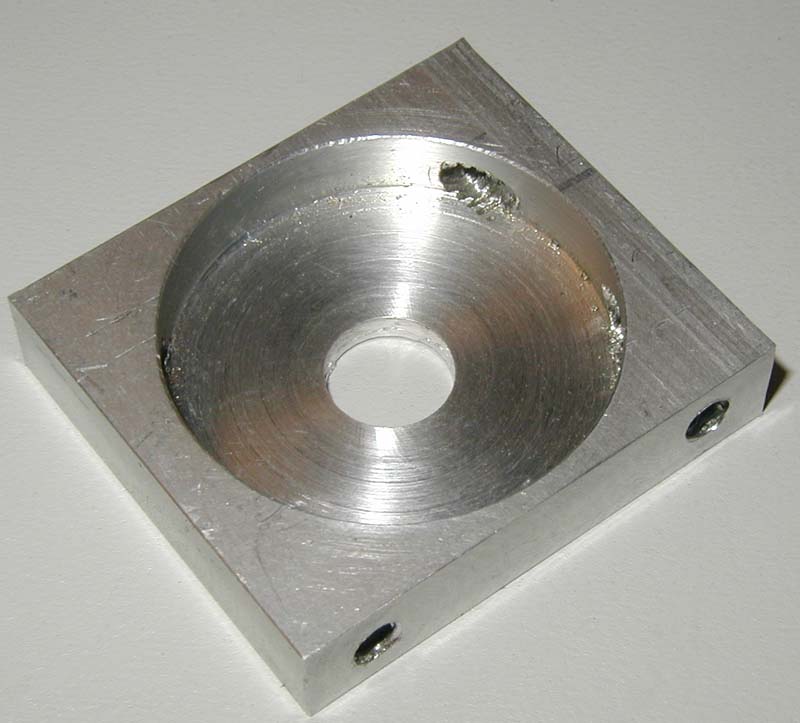
At the advice of Ted, Derek, and Alan Young, I eventually had Ted enlarge the 5/8" bore for the front bushing in order to accommodate a 3/4" bushing. This effectively moved the front axle forward a 1/16", which put it back in the same place. I need to get a boring head so that I can stop asking friends to CNC circles for me! In this picture, you can also see that I've pocketed out a lot of the (hopefully) unneeded aluminum. |
|
I machined the outer rails out of 3/16" 6061, and bolted everything together. After a bit of initial binding, the wheels turned easily enough in the bronze bushings. The belt tension felt good, so the above mentioned oversized bushing trick saved me from remaking the inner rails. Whew! Here's a short video of the first test drive. 2 Handiworks at 7.2V seemed like a good combination. I can still spin the wheels when pushing against the wall. If I had another 12 pound bot on me, and I was pushing against the wall, I might be in trouble. Here's to hoping I don't need to resort to being a pushy bot! |
 |
I'd picked up some Carbon Fiber panels that I wanted to experiment with. I decided to try to make the baseplate from CF. I didn't want both the top and base plates made from CF, since radio signals can not permeate it. Instead, I opted to leave the top plate as polycarbonate. I made sure to cover most of my skin while cutting the plate, and wore a respirator, as CF dust is very hazardous to breath. The CF cut easier then I expected, although it did dull blades quickly in my sawzall. The entire base plate (shown here bolted on as a top plate) weighed 3.5 oz! |
Drum Creation
| |
 |
For the drum material, I used some schedule 40 aluminum pipe Derek Zahn had donated to the cause. He was also kind enough to CNC some nice 3/8" thick aluminum endcaps for the pipe. Thanks Derek! |

|
I next milled a 1/2" groove into the drum to help hold onto the teeth. I put plenty of bolt holes in, wanting to hold the teeth as securely as possible. The teeth are made out of the same material as we use in Helios, 1/2" precision ground air hardening steel. The retaining bolts are counter sunk in order to avoid being knocked off. |
 |
Weighing the components shows the drum at only 2 pounds, which is a pound lighter then I wanted. Time to fatten up the drum! |
 |
I decided to use a technique Ted and I came up with on the long drive back from Tempe. I made a few "uber-nuts" from 3/8" X 3/4" steel. The flathead bolts passed through the aluminum pipe, and screwed directly into this nut. This would both add weight to the drum, and hopefully solve the stripping issue we'd seen on Helios. This brought the drum weight up to 2.75 pounds. |
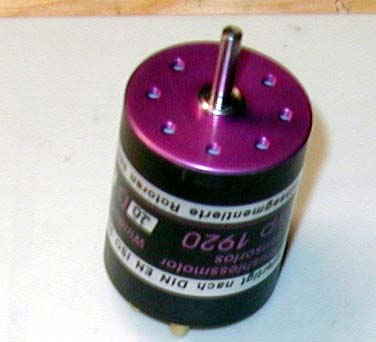 |
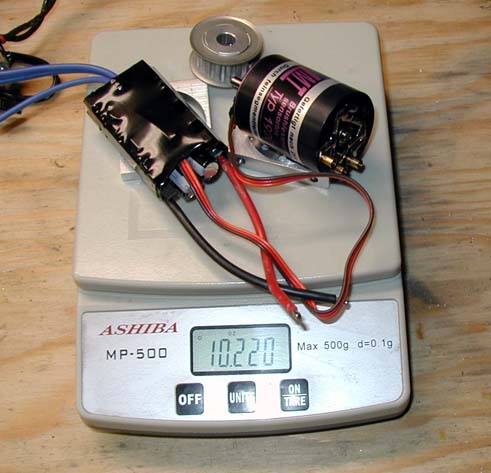
By this point, I'd also missed bringing Solaris to BotBash. At Derek & Ted's advice, I decided to find a beefier motor to spin the drum. People were starting to use the Promaxx motor I originally selected in antweights. That was incentive enough. After looking around, I decided on a Lehner 1920/20. It cost a lot of bucks, but seemed to have the best performance numbers of anything out there. |

|
Picking a new motor let me change my mind about a few other things too. I changed the reduction ratio to the drum, and decided to run at 9.6V, instead of the original 12 volts as planned. I also decided that the 1/2" aluminum drum axle wasn't going to cut it, ans switched out to a 1/2" titanium axle. |
|
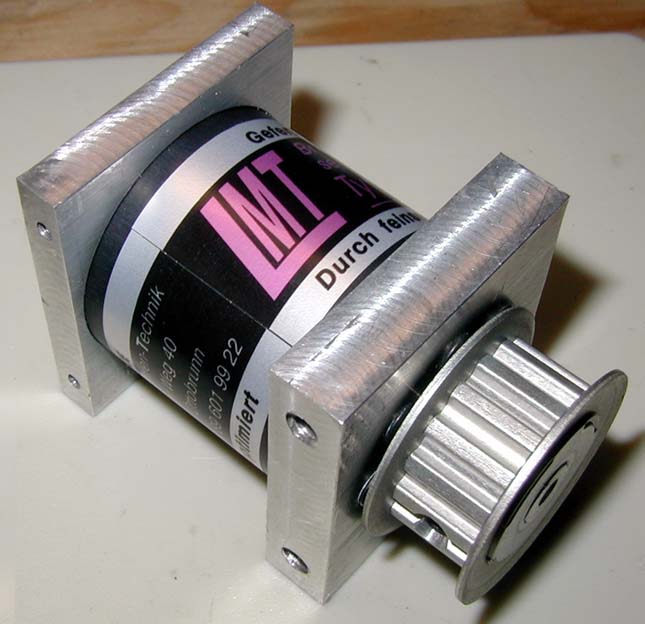
I had to remake the motor mounts, and the front plate. This motor was shorter, but larger in diameter. The controller, motor, pulleys, and mounts only weighed 10.2 ounces. Not bad for a theoretical 1000 watt motor! |

|
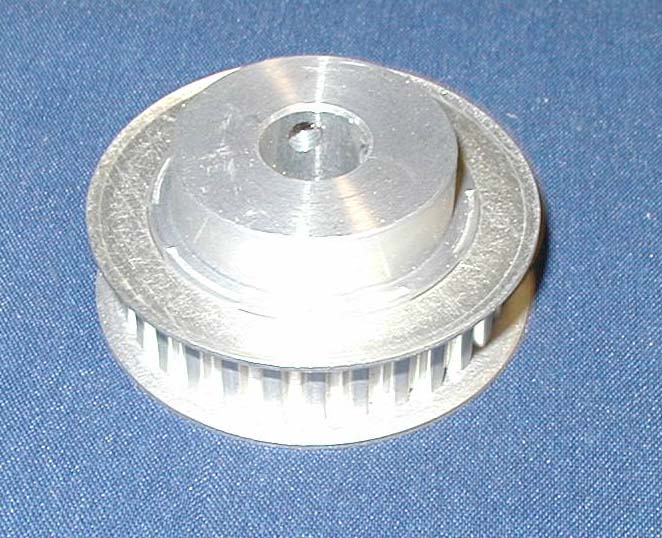
My first attempt at attaching the pulley to the drum involve milling the hub and flanges off a large 30 tooth timing pulley. The bearing for the drum was captured between the two pieces. |
 |
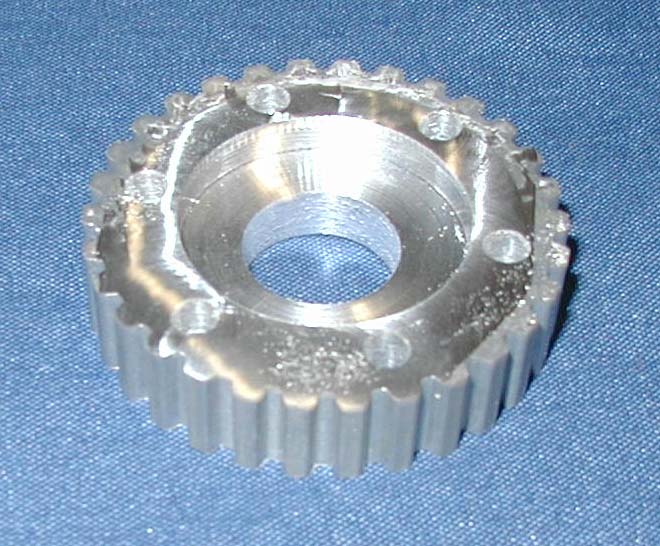
Now trying to beat the clock for RMRS, I did a quick weapon test. This pointed out problems with the drum. After a few measurements were made, I realized that the end caps were off considerably. A few long nights of lathing on Derek Zahn's great Sherline lathe resulted in new end caps. I attached my backup 30 tooth pulley a little differently this time, retaining one of the flanges. The end caps turned out much truer, and eliminated the vibration I'd seen before. |
|
I quickly made some delrin standoffs to allow Solaris to be invertable. This more or less finished the bot, at least for RMRS. Solaris ended up taking first place, dishing out an impressive amount of damage to it's opponents. I ran out of time to get the teeth heat treated, so they ended up getting pretty beat up. I ended up being .5 pounds underweight, and added a bunch of self adhesive lead weights to bring him to to weight. |

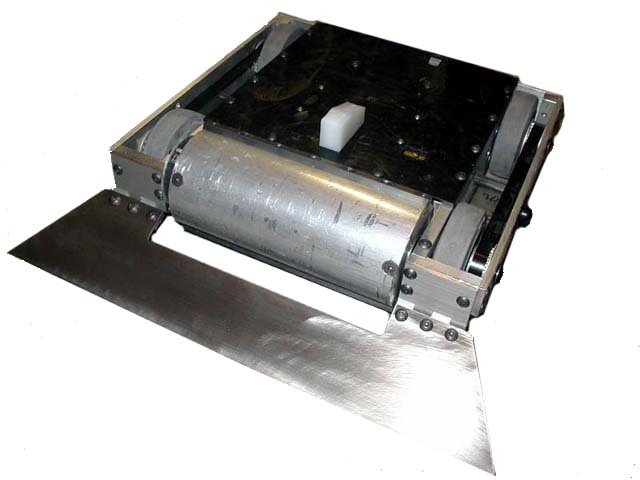 |
For Steel Conflict and Motorama, I wanted to try one design feature I'd been thinking about since day one. I made a titanium wedge for the front. This would hopefully keep those pesky wedges from getting under me. Unfortunately, the sloping front of the wheel pods proved to complicate mounting. I'm not convinced the hinges are beefy enough to keep the wedge from interfering with the drum. We'll see... I also eliminated one of the two delrin standoffs. With two on top, only one rear wheel was on the ground when inverted. Removing one standoff will hopefully solve this problem. |